Little Quadruped Has PCB Spine And No Wiring

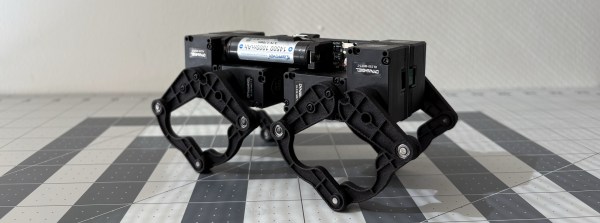
Dealing with all the wiring can quickly become a challenge on robots, especially the walking variety which have actuators everywhere. [Eric Yufeng Wu] sidestepped the wiring issue by creating Q8bot, a little quadruped where all the components, including the actuators, are mounted directly on the PCB.

[Eric] uses a custom PCB as the spine of the robot, and the eight servos plug directly into connectors on the PCB. With their bottom covers removed, the servos screw neatly into a pair of 3D printed frames on either side of the PCB, which also have integrated 14500 battery holders. The PCB is minimalist, with just the XIAO ESP32C3 module, a boost converter circuit to drive the servos, and a battery fuel gauge. Each SCARA-style leg consists of four SLS 3D printed segments, with press-fit bearings in the joints.

The little one moves quickly, and can even do little jumps. For this prototype, most of the control processing is done on a laptop, which sends raw joint angles to the onboard ESP32 via the ESP-Now protocol. We think this little robot has a lot of development potential, and fortunately [Eric] has made all the hardware and software files available for others to build their own.

Continue reading “Little Quadruped Has PCB Spine And No Wiring”

Clockwork Rover For Venus

Venus hasn’t received nearly the same attention from space programs as Mars, largely due to its exceedingly hostile environment. Most electronics wouldn’t survive the 462 °C heat, never mind the intense atmospheric pressure and sulfuric acid clouds. With this in mind, NASA has been experimenting with the concept of a completely mechanical rover. The [Beardy Penguin] and a team of fellow students from the University of Southampton decided to try their hand at the concept—video after the break.

The project was divided into four subsystems: obstacle detection, mechanical computer, locomotion (tracks), and the drivetrain. The obstacle detection system consists of three (left, center, right) triple-rollers in front of the rover, which trigger inputs on the mechanical computer when it encounters an obstacle over a certain size. The inputs indicate the position of each roller (up/down) and the combination of inputs determines the appropriate maneuver to clear the obstacle. [Beardy Penguin] used Simulink to design the logic circuit, consisting of AND, OR, and NOT gates. The resulting 5-layer mechanical computer quickly ran into the limits of tolerances and friction, and the team eventually had trouble getting their design to work with the available input forces.

Due to the high-pressure atmosphere, an on-board wind turbine has long been proposed as a viable power source for a Venus rover. It wasn’t part of this project, so it was replaced with a comparable 40 W electric motor. The output from a logic circuit goes through a timing mechanism and into a planetary gearbox system. It changes output rotation direction by driving the planet gear carrier with the sun gear or locking it in a stationary position.

As with many undergraduate engineering projects, the physical results were mixed, but the educational value was immense. They got individual subsystems working, but not the fully integrated prototype. Even so, they received several awards for their project and even came third in an international Simulink challenge. It also allowed another team to continue their work and refine the subsystems. Continue reading “Clockwork Rover For Venus”

Chinese Humanoid Robot Establishes New Running Speed Courtesy Of Running Shoes

As natural as walking is to us tail-less bipedal mammals, the fact of the matter is that it took many evolutionary adaptations to make this act of controlled falling forward work (somewhat) reliably. It’s therefore little wonder that replicating bipedal walking (and running) in robotics is taking a while. Recently a Chinese humanoid robot managed to bump up the maximum running speed to 3.6 m/s (12.96 km/h), during a match between two of Robot Era’s STAR1 humanoid robots in the Gobi desert.

For comparison, the footspeed of humans during a marathon is around 20 km/h and significantly higher with a sprint. These humanoid robots did a 34 minute run, with an interesting difference being that one was equipped with running shoes, which helped it reach these faster speeds. Clearly the same reasons which has led humans to start adopting footwear since humankind’s hunter-gatherer days – including increased grip and traction – also apply to humanoid robots.

That said, it looks like the era when humans can no longer outrun humanoid robots is still a long time off.

Continue reading “Chinese Humanoid Robot Establishes New Running Speed Courtesy Of Running Shoes”

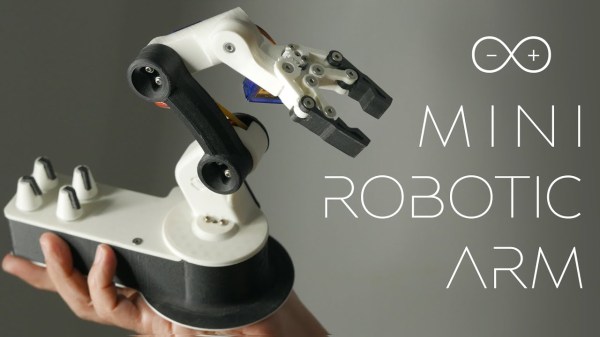
A black and white robot arm is held in a human hand against a grey background. Next to it, in white lettering, is the Arduino logo and the text, "Mini Robotic Arm."

Mini Robotic Arm Lets You Start Your Own Mini Assembly Line

Automating tasks with a robot sounds appealing, but not everyone has the budget for an Aismo or Kuka. [FABRI Creator] has a great tutorial on how to build your own mini robotic arm for small, repeatable tasks.

Walking us through the entire build, step-by-step, [FABRI Creator] shows us how to populate the custom-designed PCB and where to put every servo motor and potentiometer to bring the creation to life. This seems like a great project to start with if you haven’t branched out into motion systems before since it’s a useful build without anything too complicated to trip up the beginner.

Beyond the usual ability to use the arm to perform tasks, this particular device uses an Arduino Nano to allow you to record a set of positions as you move the arm and to replay it over and over. The video shows the arm putting rings on a stand, but we can think of all kinds of small tasks that it could accomplish for us, letting us get back to writing or hacking.

If controlling a robot arm with potentiometers sounds familiar, maybe you remember this robot arm with an arm-shaped controller.

Continue reading “Mini Robotic Arm Lets You Start Your Own Mini Assembly Line”

The Design Process For A Tiny Robot Brain

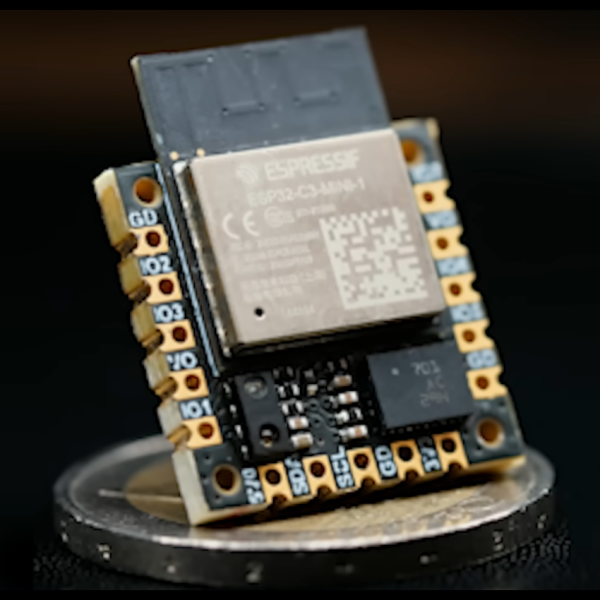
As things get smaller, we can fit more processing power into devices like robots to allow them to do more things or interact with their environment in new ways. If not, we can at least build them for less cost. But the design process can get exponentially more complicated when miniaturizing things. [Carl] wanted to build the smallest 9-axis robotic microcontroller with as many features as possible, and went through a number of design iterations to finally get to this extremely small robotics platform.

Although there are smaller wireless-enabled microcontrollers, [Carl] based this project around the popular ESP32 platform to allow it to be usable by a wider range of people. With that module taking up most of the top side of the PCB, he turned to the bottom to add the rest of the components for the platform. The first thing to add was a power management circuit, and after one iteration he settled on a circuit which can provide the board power from a battery or a USB cable, while also managing the battery’s charge. As for sensors, it has a light sensor and an optional 9-axis motion sensor, allowing for gesture sensing, proximity detection, and motion tracking.

Of course there were some compromises in this design to minimize the footprint, like placing the antenna near the USB-C charger and sacrificing some processing power compared to other development boards like the STM-32. But for the size and cost of components it’s hard to get so many features in such a small package. [Carl] is using it to build some pretty tiny robots so it suits his needs perfectly. In fact, it’s hard to find anything smaller that isn’t a bristlebot.

Continue reading “The Design Process For A Tiny Robot Brain”

DIY 3D-Printed Arduino Self-Balancing Cube

Self-balancing devices present a unique blend of challenge and innovation. That’s how [mircemk]’s project caught our eye. While balancing cubes isn’t a new concept — Hackaday has published several over the years — [mircemk] didn’t fail to impress. This design features a 3D-printed cube that balances using reaction wheels. Utilizing gyroscopic sensors and accelerometers, the device adapts to shifts in weight, enabling it to maintain stability.

At its core, the project employs an Arduino Nano microcontroller and an MPU6050 gyroscope/accelerometer to ensure precise control. Adding nuts and bolts to the reaction wheels increases their weight, enhancing their impact on the cube’s balance. They don’t hold anything. They simply add weight. The construction involves multiple 3D printed components, each requiring several hours to produce, including the reaction wheels and various mount plates. After assembly, users can fine-tune the device via Bluetooth, allowing for a straightforward calibration process to set the balancing points.

If you want to see some earlier incarnations of this sort of thing, we covered other designs in 2010, 2013, and 2016. These always remind us of Stewart platforms, which are almost the same thing turned inside out.

Continue reading “DIY 3D-Printed Arduino Self-Balancing Cube”

Tinkering With Klipper: Making The ManiPilator Robotic Arm

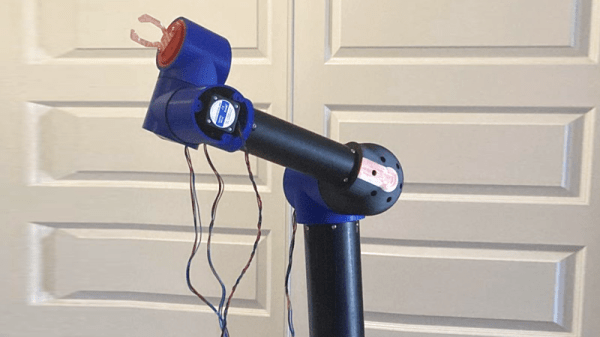
[Leo Goldstien]’s entry into the world of robotics has been full of stops and starts. Like many beginners, he found traditional robotics instructions overwhelming and hard to follow, bogged down with dense math that often obscured the bigger picture. So he decided to approach things differently and create something with his own hands. The result? A 3D-printed robotic arm he affectionately calls “ManiPilator.”

This article is the first in a three-part series documenting [Leo]’s hands-on approach to learning robotics from the ground up. Building ManiPilator became an opportunity to learn by doing, and the project took him on a journey of experimenting, failing, and eventually succeeding in tasks that seemed deceptively simple at first glance. Each hurdle provided him with insights that more traditional learning methods hadn’t delivered. Below is one of the videos [Leo] captured, to show one step in the process: doing a check using multiple motors.

To make his project work, [Leo] relied on open-source software like Klipper, piecing together code and hardware in a way that made sense to him. In sharing his story, he offers fellow beginners an approachable perspective on robotics, with practical insights and candid reflections on the challenges and breakthroughs.

[Leo]’s project shows that there’s more than one way to start exploring robotics, and that sometimes the best way to learn is simply to dive in and start building. Follow along with his journey as he tackles the complexities of robotics, one step at a time.

Continue reading “Tinkering With Klipper: Making The ManiPilator Robotic Arm”