A Homebrew Gas Chromatograph That Won’t Bust Your Budget

Chances are good that most of us will go through life without ever having to perform gas chromatography, and if we do have the occasion to do so, it’ll likely be on a professional basis using a somewhat expensive commercial instrument. That doesn’t mean you can’t roll your own gas chromatograph, though, and if you make a few compromises, it’s not even all that expensive.

At its heart, gas chromatography is pretty simple; it’s just selectively retarding the movement of a gas phase using a solid matrix and measuring the physical or chemical properties of the separated components of the gas as they pass through the system. That’s exactly what [Markus Bindhammer] has accomplished here, in about the simplest way possible. Gas chromatographs generally use a carrier gas such as helium to move the sample through the system. However, since that’s expensive stuff, [Markus] decided to use room air as the carrier.

The column itself is just a meter or so of silicone tubing packed with chromatography-grade silica gel, which is probably the most expensive thing on the BOM. It also includes an injection port homebrewed from brass compression fittings and some machined acrylic blocks. Those hold the detectors, an MQ-2 gas sensor module, and a thermal conductivity sensor fashioned from the filament of a grain-of-wheat incandescent lamp. To read the sensors and control the air pump, [Markus] employs an Arduino Uno, which unfortunately doesn’t have great resolution on its analog-to-digital converter. To fix that, he used the ubiquitous HX7111 load cell amplifier to read the output from the thermal conductivity sensor.

After purging the column and warming up the sensors, [Markus] injected a sample of lighter fuel and exported the data to Excel. The MQ-2 clearly shows two fractions coming off the column, which makes sense for the mix of propane and butane in the lighter fuel. You can also see two peaks in the thermal conductivity data from a different fuel containing only butane, corresponding to the two different isomers of the four-carbon alkane.

[Markus] has been on a bit of a tear lately; just last week, we featured his photochromic memristor and, before that, his all-in-one electrochemistry lab.

Continue reading “A Homebrew Gas Chromatograph That Won’t Bust Your Budget”

A cartoon of the Sun above a windmill and a solar panel with a lightning bolt going to a big grey gear with "AAAp" written on it. A small "e-" on a circle is next to it, indicating electricity transfer. Further to the right is an ADP molecule connected to a curved arrow going through the AAAp gear to turn into ATP. Three cartoon shapes, presumably illustrating biological processes are on the right with arrows pointing from the ATP.

Powering Biology With Batteries

We’ve all been there — you forgot your lunch, but there are AC outlets galore. Wouldn’t it be so much simpler if you could just plug in like your phone? Don’t try it yet, but biologists have taken us one step further to being able to fuel ourselves on those sweet, sweet electrons.

Using an “electrobiological module” of 3-4 enzymes, the amusingly named AAA (acid/aldehyde ATP) cycle regenerates ATP in biological systems directly from electricity. The process takes place at -0.6 V vs a standard hydrogen electrode (SHE), and is compatible with biological transcription/translation processes like “RNA and protein synthesis from DNA.”

The process isn’t dependent on any membranes to foul or more complicated sets of enzymes making it ideal for in vitro synthetic biology since you don’t have to worry about keeping as many components in an ideal environment. We’re particularly interested in how this might apply to DNA computing which we keep being promised will someday be the best thing since the transistor.

Maybe in the future we’ll all jack in instead of eating our daily food pill? If this all seems like something you’ve heard of before, but in reverse, maybe you’re thinking of microbial fuel cells.

Optical Tweezers Investigate Tiny Particles

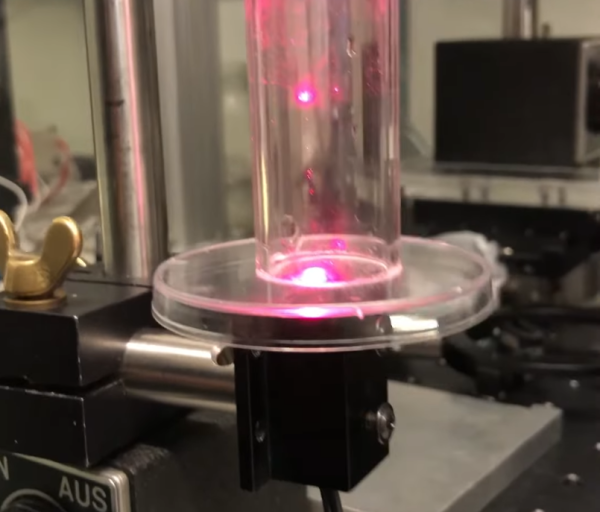
No matter how small you make a pair of tweezers, there will always be things that tweezers aren’t great at handling. Among those are various fluids, and especially aerosolized droplets, which can’t be easily picked apart and examined by a blunt tool like tweezers. For that you’ll want to reach for a specialized tool like this laser-based tool which can illuminate and manipulate tiny droplets and other particles.

[Janis]’s optical tweezers use both a 170 milliwatt laser from a DVD burner and a second, more powerful half-watt blue laser. Using these lasers a mist of fine particles, in this case glycerol, can be investigated for particle size among other physical characteristics. First, he looks for a location in a test tube where movement of the particles from convective heating the chimney effect is minimized. Once a favorable location is found, a specific particle can be trapped by the laser and will exhibit diffraction rings, or a scattering of the laser light in a specific way which can provide more information about the trapped particle.

Admittedly this is a niche tool that might not get a lot of attention outside of certain interests but for those working with proteins, individual molecules, measuring and studying cells, or, like this project, investigating colloidal particles it can be indispensable. It’s also interesting how one can be built largely from used optical drives, like this laser engraver that uses more than just the laser, or even this scanning laser microscope.

Continue reading “Optical Tweezers Investigate Tiny Particles”

Reverse Engineering Smart Meters, Now With More Fuming Nitric Acid

If you’re lucky, reverse engineering can be a messy business. Sure, there’s something to be said for attacking and characterizing an unknown system and leaving no trace of having been there, but there’s something viscerally satisfying about destroying something to understand it. Especially when homemade fuming nitric acid is involved.

The recipient of such physical and chemical rough love in the video below is a residential electric smart meter, a topic that seems to be endlessly fascinating to [Hash]; this is far from the first time we’ve seen him take a deep dive into these devices. His efforts are usually a little less destructive, though, and his write-ups tend to concentrate more on snooping into the radio signals these meters are using to talk back to the utility company.

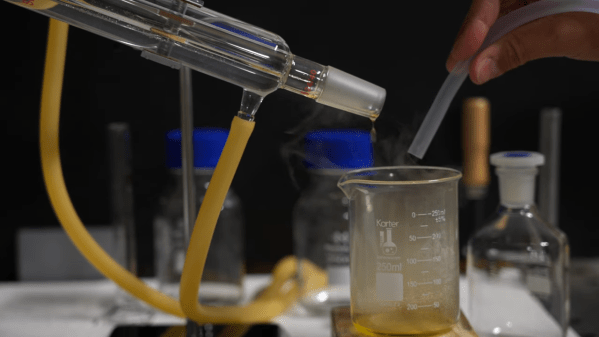
This time around, [Hash] has decided to share some of his methods for getting at these secrets, including decapping the ICs inside. His method for making fuming nitric acid from stump remover and battery acid is pretty interesting; although the laboratory glassware needed to condense the FNA approaches the cost of just buying the stuff outright, it’s always nice to have the knowledge and the tools to make your own. Just make sure to be careful about it — the fumes are incredibly toxic. Also detailed is a 3D-printable micropositioner, used for examining and photographing acid-decapped ICs under the microscope, which we’d bet would be handy for plenty of other microscopy jobs.

In addition to the decapping stuff, and a little gratuitous destruction with nitric acid, [Hash] takes a look at the comparative anatomy of smart meters. The tamper-proofing features are particularly interesting; who knew these meters have what amounts to the same thing as a pinball machine’s tilt switch onboard?

Continue reading “Reverse Engineering Smart Meters, Now With More Fuming Nitric Acid”

Darkroom Robot Automates Away The Tedium Of Film Developing

Anyone who has ever processed real analog film in a darkroom probably remembers two things: the awkward fumbling in absolute darkness while trying to get the film loaded into the developing reel, and the tedium of getting the timing for each solution just right. This automatic film-developing machine can’t help much with the former, but it more than makes up for that by taking care of the latter.

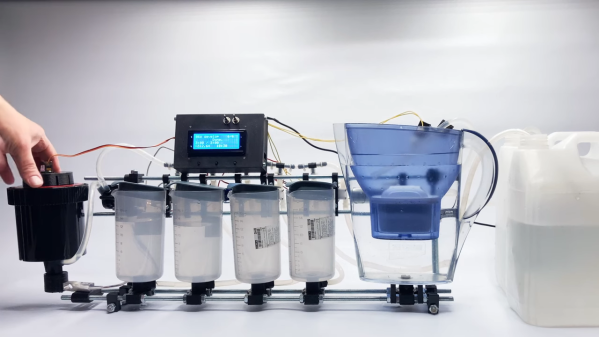
For those who haven’t experienced the pleasures of the darkroom — and we mean that sincerely; watching images appear before your eyes is straight magic — film processing is divided into two phases: developing the exposed film from the camera, and making prints from the film. [kauzerei]’s machine automates development and centers around a modified developing tank and a set of vessels for the various solutions needed for different film processes. Pumps and solenoid valves control the flow of solutions in and out of the developing tank, while a servo mounted on the tank’s cover gently rotates the reel to keep the film exposed to fresh solutions; proper agitation is the secret sauce of film developing.

The developing machine has a lot of other nice features that really should help with getting consistent results. The developing tank sits on a strain gauge, to ensure the proper amount of each solution is added. To avoid splotches that can come from using plain tap water, rinse water is filtered using a household drinking water pitcher. The entire rig can be submerged in a heated water bath for a consistent temperature during processing. And, with four solution reservoirs, the machine is adaptable to multiple processes. [kauzerei] lists black and white and C41 color negative processes, but we’d imagine it would be easy to support a color slide process like E6 too.

This looks like a great build, and while it’s not the first darkroom bot we’ve seen — we even featured one made from Lego Technics once upon a time — this one has us itching to get back into the darkroom again.

Continue reading “Darkroom Robot Automates Away The Tedium Of Film Developing”

Tech In Plain Sight: Super Glue

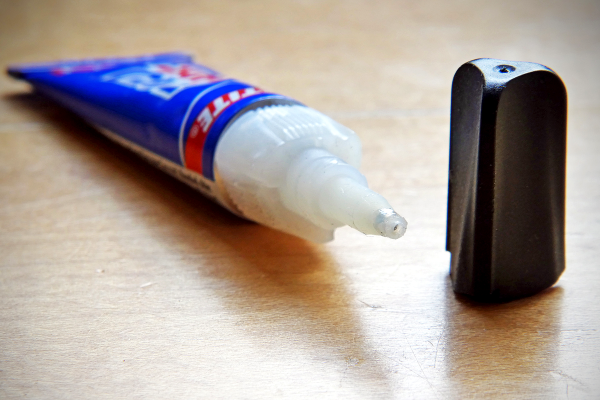
Many inventions happen not by design but through failure. They don’t happen through the failure directly, but because someone was paying attention and remembered the how and why of the failure, and learns from this. One of these inventions is Super Glue, the adhesive that every tinkerer and engineer has to hand to stick pretty much anything to anything, quickly. Although it was a complete failure for the original uses it was developed for, a chemist with good memory and an eye for a helpful product created it in a process he described as “one day of synchronicity and ten years of hard work.”

Super Glue was initially invented in 1942, when the chemist Harry Coover was working on a team trying to develop a clear plastic gun sight that would be cheaper than the metal ones already in use. The team cast a wide net, trying a range of new materials. Coover was testing a class of chemicals called cyanoacrylates. They had some promise, but they had one problem: they stuck to pretty much everything. Every time that Coover tried to use the material to cast a gun sight, it stuck to the container and was really hard to remove. 

When the samples he tried came into contact with water, even water vapor in the air, they immediately formed an incredibly resilient bond with most materials. That made them lousy manufacturing materials, so he put the cyanoacrylates aside when the contract was canceled. His employer B. F. Goodrich, patented the process of making cyanoacrylates in 1947, but didn’t note any particular uses for the materials: they were simply a curiosity. 

It wasn’t until 1951 when Coover, now at Eastman Kodak, remembered the sticky properties of cyanoacrylates. He and his colleague Fred Joyner were working on making heat-resistant canopies for the new generation of jet fighters, and they considered using these sticky chemicals as adhesives in the manufacturing process. According to Coover, he told Joyner about the materials and asked him to measure the refractive index to see if they might be suitable for use. He warned him to be careful, as the material would probably stick in the refractometer and damage it. Joyner tested the material and found it wasn’t suitable for a canopy but then went around the lab using it to stick things together. The two realized it could make an excellent adhesive for home and engineering use. Continue reading “Tech In Plain Sight: Super Glue”

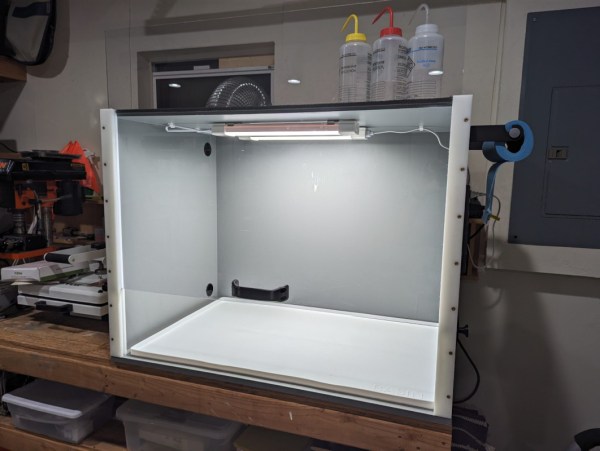
Custom Fume Hood For Safe Electroless Plating

There are plenty of chemical processes that happen commonly around the house that, if we’re really following safety protocols to the letter, should be done in a fume hood. Most of us will have had that experience with soldering various electronics, especially if we’re not exactly sure where the solder came from or how old it is. For [John]’s electroless plating process, though, he definitely can’t straddle that line and went about building a fume hood to vent some of the more harmful gasses out of a window.

This fume hood is pretty straightforward and doesn’t have a few of the bells and whistles found in commercial offerings, but this process doesn’t really require things like scrubbing or filtering the exhaust air so he opted to omit these pricier and more elaborate options. What it does have, though, is an adjustable-height sash, a small form factor that allows it to easily move around his shop, and a waterproof, spill-collecting area in the bottom. The enclosure is built with plywood, allowing for openings for an air inlet, the exhaust ducting, and a cable pass-through, and then finished with a heavy-duty paint. He also included built-in lighting and when complete, looks indistinguishable from something we might buy from a lab equipment supplier.

While [John] does admit that the exhaust fan isn’t anything special and might need to be replaced more often than if he had gone with one that was corrosion-resistant, he’s decided that the cost of this maintenance doesn’t outweigh the cost of a specialized fan. He also notes it’s not fire- or bomb-proof, but nothing he’s doing is prone to thermal anomalies of that sort. For fume hoods of all sorts, we might also recommend adding some automation to them so they are used any time they’re needed.

Continue reading “Custom Fume Hood For Safe Electroless Plating”