A series of wooden rectangles are arranged vertically around the edges of a dark wooden base, reminiscent of a very tall radial fan. Light glows from the base up the slots between the vanes. a cord runs from behind the dark base to a small puck of the same color. The setup sits on a light grey table in front of a light grey wall.

A Beautiful Lamp-Inspired PC Case

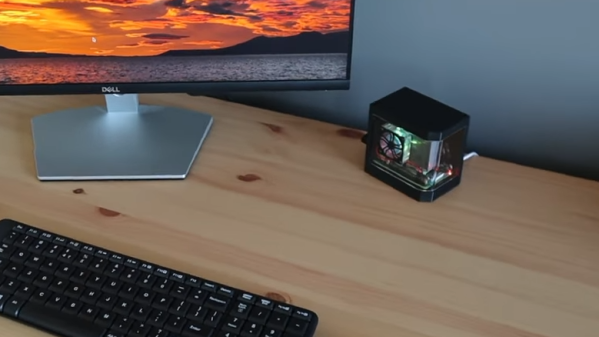
Sometimes you see something super cool and think of how it would be really neat if applied in a totally different context. [MXC Builds] saw an awesome lamp from [karacreates], but decided it would be better as a PC case.

We love seeing how different techniques can be used in conjunction to make something that no one method could produce on its own, and for this build, we see [MXC Builds] use 3D printing, laser cutting, CNC, sewing, soldering, and traditional woodworking techniques.

A large part of the video is spent on the CNC process for the walnut base and power button enclosure for the build. As with any project, there are a few places requiring some creative use of the tools on hand, like the walnut piece for the base being too tall for the machine’s usual z-calibration puck or any of [MXC Builds]’s bits to do in one pass, and it’s always interesting to see how other makers solve these issues.

If you’re looking for other beautiful casemods, how about a transparent PS2 or this Art Deco number? Before you go, may we bend your ear about how PC Cases are Still Stuck in the Dark Ages?

Continue reading “A Beautiful Lamp-Inspired PC Case”

A Guide To Laser Cutting Metal, If You’ve Got The Cash

While many of us now have laser cutters — either a K40-style machine or one of the newer high-output diodes — you probably don’t have one that cuts metal. True, some hobby lasers now offer IR laser heads with modest power to engrave metal. The xTool S1, for example, accepts a 2 W IR laser as an option, but we doubt it would cut through anything thicker than foil. However, there are a growing number of fiber and carbon dioxide lasers that can cut metal at semi-reasonable prices, and [All3DP] has a primer on the technology that is worth a read.

According to the post, CO2 lasers are less expensive but require gas assist, can’t work with shiny metals well, and are finicky because of the mirrors and glass tube inside. Fiber lasers cost more, but don’t need gas, work on more materials, and have fewer parts that need maintenance or may be prone to damage. There are other kinds of lasers, but the post focuses on these, the most common ones.

Machines that can cut metal aren’t cheap. They start at about $10,000. However, prices are dropping and we remember when $10,000 would buy you what would today be a terrible oscilloscope, so maybe there’s hope for an impulse-buy metal-cutting laser one day.

It isn’t that diode lasers can’t cut metal at all, but the results are not terribly useful. What would you rather have? A metal cutter or a metal 3D printer?

Better Laser Cuts: Know Your Kerf

The recent crop of laser cutters are nothing short of miraculous. For a few hundred dollars you can get a machine that can easily engrave and — subject to materials — cut well, too. [Nate] has been taking advantage of a laser to make boxes that join together using finger joinery. The problem is, the pieces have to fit exactly to get a good box. While setting dimensions in software is fine, you need to account for how much material the laser removes — something traditional woodworkers and machinists know as kerf.

You can, of course, employ trial and error to get good results. But that’s wasteful and potentially time-consuming. [Nate] built a “tolerance fence” that is quick to cut out and allows accurate measurement of kerf. You can quickly use the tolerance fence to make measurements and increase your chances of nailing your boxes on the first cut.

You have to customize the fence based on the thickness of your material. [Nate] uses Lightburn, which probably has a kerf offset already set by default in your layers. If not, you’ll need to turn it on and set an estimate of your kerf size. Then you are ready to cut the fence pieces and see how they fit together.

If the fit is too loose, you want to raise the kerf setting and try again. If it is too tight, you lower the kerf setting. As [Nate] says, “Lower equals looser.”

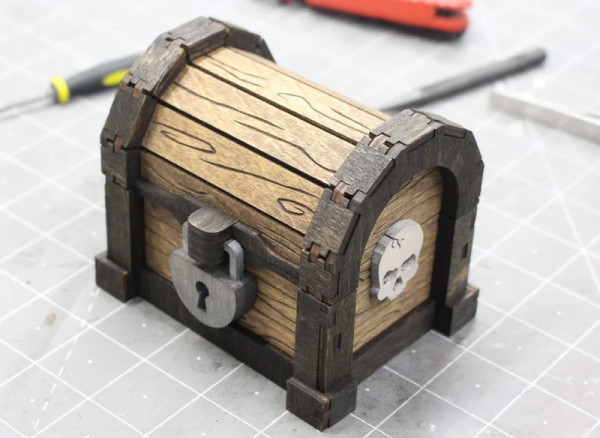
The results speak for themselves, as you can see in the treasure chest image [Nate] provided. Well worth the effort to get this parameter right. We do enjoy laser cutting and engraving things. If you are cutting and don’t have air assist, you really need to hack up something.

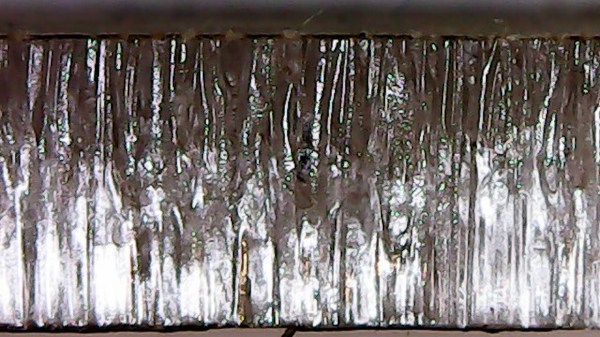
A closeup picture showing the jagged edge of the cut

Debugging Laser Cut Wobble, The Scientific Way

[PWalsh] was using his lasercutter to cut acrylic, expecting the cuts to have a pleasantly smooth edge. Alas, the edges turned out to be wobbly and sandpaper-like, not smooth in the slightnest. Bummer! Internet suggested a stepper motor swap, but not much in the way of insights – and that would’ve been a royal pain for sure. How would you approach debugging such a problem? Well, [PWalsh] didn’t want to swap crucial components willy-nilly, going the scientific way instead, and breaks it down for us.

Having compiled an extensive list of possible places to look for a fault in, he started going through fundamental assumptions. Do other lasercutters experience this issue? No, even the cheap ones can cut things properly. Is it water level causing intermittent cooling? Nope, not that. Is it the stepping settings? Tweaked, not that. Laser pulsing frequency? No dice. Continue reading “Debugging Laser Cut Wobble, The Scientific Way”

Testing A Laser Cut Wrench VS A Forged Wrench

It is easy to not think much about common tools like screwdrivers and wrenches. But not for [Torque Test Channel]. The channel does a lot of testing of tools and in the video, below, they test a new wrench that is, oddly enough, laser cut instead of forged like the usual wrench.

You would expect a machined wrench to be weaker than a forged wrench. We were impressed, though, that there is so much difference between wrenches when you start making measurements.

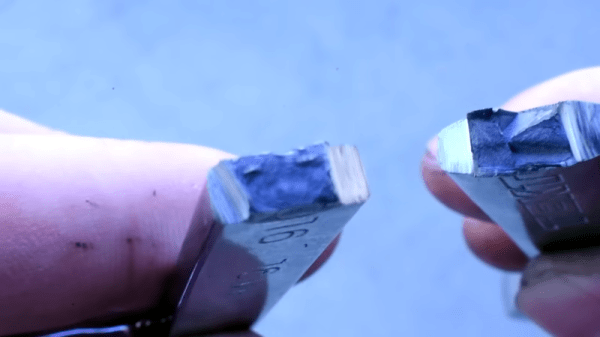
Speaking of measurements, we would like to see more details of the test setups shown both in the video and in some of the video clips included. We did enjoy seeing the examination of the internal grain structure of both wrenches.

Be forewarned. Watching this video is likely going to send you to the computer to buy some new wrenches, especially if you don’t have 30/60 head wrenches.

The real question is why laser cut a wrench? It doesn’t seem like it is actually better than the forged variant. It is more expensive, but the setup costs for forging are higher. Particularly for a tool made in the United States, forging is both expensive and it is difficult to find time on the limited number of large-scale forges left in the country.

Continue reading “Testing A Laser Cut Wrench VS A Forged Wrench”

Custom Raspberry Pi Case Shows The Whole Workflow

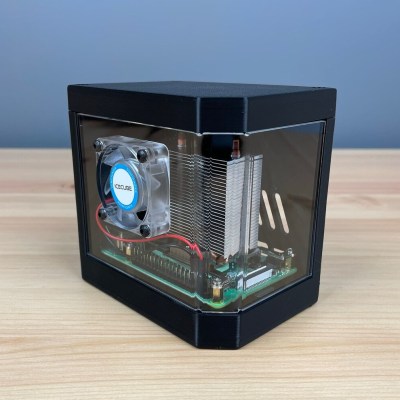
If you are a process junkie and love seeing the end-to-end of how a thing is made and with what tools, then watch [Michael Klements] show off his Raspberry Pi case design. His case has quite a few cool-looking elements to it, and incorporates 3D printing as well as laser-cut and clear bent acrylic for a gorgeous three-quarter view.

[Michael]’s write-up (and accompanying video, embedded below) are partly a review of his Creality 3D printer, and partly a showcase of his Raspberry Pi case design (for which he sells the design files for a small fee on his Etsy store.) But the great part is seeing the creation of every piece that goes into the end product. Not everyone is familiar with the way these tools work, or what they can create, so it’s nice to see attention paid to that side of things.

Both the blog post and the video nicely show off what goes into every part. The video opens with unpacking and setting up the 3D printer (skip ahead to 4:58 if you aren’t interested), followed by printing the parts, laser-cutting the acrylic on a K40 laser cutter, bending the acrylic using a small hand tool, and finally, assembling everything. For the curious, there are also links to the exact parts and equipment he uses.

Like we said, it’s part 3D printer review and part showcase of a design he sells, but it’s great to see each of the parts get created, watch the tools get used, and see the results come together in the final product. And should you wish to go in the opposite direction? A one-piece minimalist case for your Raspberry Pi is only a 3D printer away.

Continue reading “Custom Raspberry Pi Case Shows The Whole Workflow”

This Spherical Lamp’s Pieces Ship Flat, Thanks To Math

[Nervous System] sells a variety of unique products, and we really appreciate the effort they put into sharing elements of their design and manufacturing processes. This time, it’s details of the work that went into designing a luxury lamp shade that caught our eye.

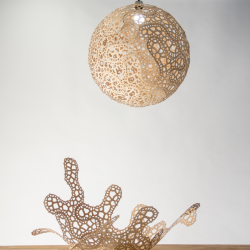
Top: Finished lamp. Bottom: Partially-assembled.

The finished lamp shade is spherical, but is made entirely from flat-packed pieces of laser-cut wood that have been specifically designed to minimize distortion when assembled into a curved shape. The pieces themselves are reminiscent of puzzle cells; complex, interlocking cellular shapes found in many plants.

As usual, [Nervous System] applied a hefty dose of math and computational design to arrive at a solution. Each unique panel of the lamp is the result of a process that in part implements a technique called variation surface cutting for the shape of the pieces. They also provide a couple of nifty animations that illustrate generating both the piece boundaries as well as the hole patterns in each of the 18 unique pieces that make up each lamp.

As for making the pieces themselves, they are laser-cut from wood veneer, and assembly by the end user takes an hour or two. Watch a video overview, embedded just below under the page break.

We’re glad [Nervous System] takes the time to share details like this, just like the time they figured out the very best type of wood for laser-cutting their unique puzzles and didn’t keep it to themselves.

Continue reading “This Spherical Lamp’s Pieces Ship Flat, Thanks To Math”